Cluster Installation On Physical Hosts:
MySQL Cluster Installation:
Lets create a MySQL Cluster with the following environment:
MySQL Cluster 8.0.22 version
2 Management servers
4 Data nodes servers
2 Mysqld servers
4 API nodes
OS: Ubuntu 20.04 LTS
Data Node1: Hostname: cluster-test03, IP: 100.103.21.126
Data Node2: Hostname: cluster-test04, IP: 100.103.21.129
Data Node3: Hostname: cluster-test05, IP: 100.103.21.130
Data Node4: Hostname: cluster-test06, IP: 100.103.21.125
Mysqld Server 1 (mysqld1):
Hostname: cluster-test07, IP: 100.103.21.137
Mysqld Server 2 (mysqld2):
Hostname: cluster-test08, IP: 100.103.21.127
Get the MySQL Cluster binaries:
A sample config.ini file looks like below:
[ndbd default]
NoOfReplicas = 2
DataMemory= 5G
DataDir={BASE_DIR}/ndbd/data/ #data directory for all the data nodes
[ndb_mgmd]
#Management node 1
NodeId = 1
HostName = 100.103.21.121
#Management node 2
NodeId = 2
HostName = 100.103.21.131
[ndbd]
#Data node 1
NodeId = 3
HostName = 100.103.21.126
[ndbd]
#Data node 2
NodeId = 4
HostName = 100.103.21.129
[ndbd]
#Data node 3
NodeId = 5
HostName = 100.103.21.130
[ndbd]
#Data node 4
NodeId = 6
HostName = 100.103.21.125
[mysqld]
#API node 1
NodeId = 45
[mysqld]
#API node 2
NodeId = 46
[mysqld]
#API node 3
NodeId = 47
[mysqld]
#API node 4
NodeId = 48
A sample my.cnf file looks like below:
[MYSQLD]
#IP address of both the management nodes
ndb-connectstring=100.103.21.121,100.103.21.131
# Options for ndbd process:
[MYSQL_CLUSTER]
#IP address of both the management nodes
ndb-connectstring=100.103.21.121,100.103.21.131
[client]
port=13010
socket=/tmp/mysql.sock
[mysqld]
user=root
port=13010
socket=/tmp/mysql.sock
basedir={BASE_DIR}
datadir={BASE_DIR}/mysqld_data/data/
Once the configuration file is ready, the next step is to install the mysqld server on both the host (cluster-test07, cluster-test08).
Initialize the mysqld installation:
Run the below command from the mysqld hosts (cluster-test07, cluster-test08):
BASE_DIR> bin/mysqld --basedir=<path of BASE_DIR> --datadir=<path of mysqld data directory> --initialize-insecure
Do the same for the second mysqld server (mysqld2) on host cluster-test08.
From the below image, we can see that mysqld server has been installed on the
second mysqld host (cluster-test08).
Now Start the cluster:
Starting sequence of all the nodes:
The management node(s) should br started first, then all of the data nodes and
at the end all of the mysqld servers.
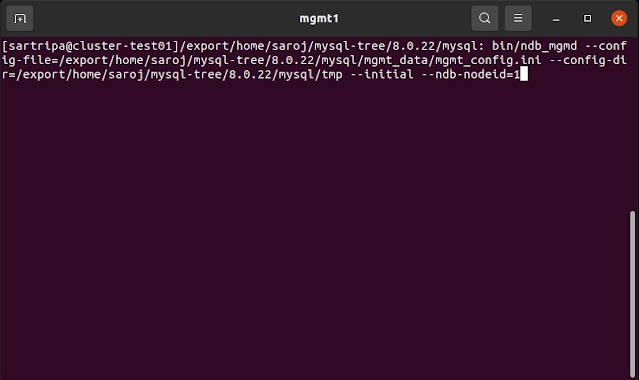
Start the management node(s)
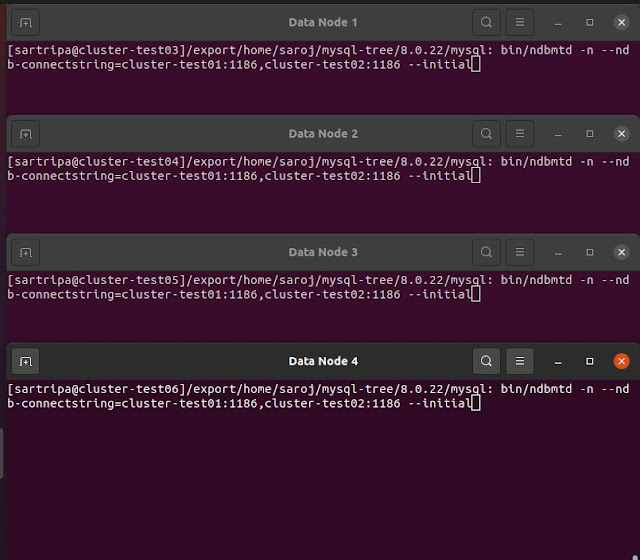
Start all the data nodes
Start the mysqld server(s)
Mgmt 1:
BASE_DIR of management server 1 (cluster-test01)>
bin/ndb_mgmd \
--config-file={BASE_DIR}/mgmt_data/mgmt_config.ini \
--config-dir={BASE_DIR}/tmp \
--initial --ndb-nodeid=1
Mgmt 2:
BASE_DIR of management server 2 (cluster-test02)>
bin/ndb_mgmd \
--config-file={BASE_DIR}/mgmt_data/mgmt_config.ini \
--config-dir={BASE_DIR}/tmp \
--initial --ndb-nodeid=2
Start the first management node from host cluster-test01:
Start the second management node from host cluster-test02:
Running the second mgmt server (mgmt2):
Check the status of the management nodes:
Lets check the status of both the management servers from the management
client (bin/ndb_mgm).
BASE_DIR> bin/ndb_mgm
We can see that both the management servers are up and running.
Start all the data nodes:
bin/ndbmtd -n \
Check the status of all the data nodes:
Lets check the status of the all the data nodes by running ‘show’ command from the management client (bin/ndb_mgm):
The status ‘not started’, shows that data node processes are running, but are not attempting to start yet. To start a data node process, issue a ‘start’ command from the management client.
ndb_mgm> data_node_id start
From the below image, we can see that all the data nodes have started successfully.
We can see that all the data nodes are up and running.
Start the mysqld server(s):
mysqld1: BASE_DIR> bin/mysqld --defaults-file={BASE_DIR}/my.cnf &
mysqld2: BASE_DIR> bin/mysqld --defaults-file={BASE_DIR}/my.cnf &
Check the status of the mysqld server(s):
Lets check the status of both the mysqld server from the management client (bin/ndb_mgm).
We can see that our new cluster is now up and running, hurray... 😀
Connect to NDB cluster using the mysql client:
Lets start the mysql client and connect to the MySQL Cluster which we have just created. Then we can create a database, a table and execute some transactions on the table.
Create a database and table:
To create a table in MySQL Cluster, table must be created with engine=ndbcluster or engine=ndb else it will be created in Innodb engine. Its a good practise to enable the warnings while doing any transactions on a table.
Lets check the table to see the rows we have just inserted:
Lets do one delete operation on the table ‘actor’ and then check again :
We can see that row number ‘6’ is successfully deleted from the table. So we have created a cluster and executed some transactions on it. Lets connect to the cluster thru mysql client from the second mysql server (mysqld2) and verify that all table data exist:
MySQL client started from the second mysqld server. Check the database ‘test1’ and table ‘actor’ exists.


Comments
Post a Comment